WhatsApp Meta Cloud API is an enterprise-grade solution for companies needing to integrate WhatsApp messaging into apps. It helps enable smooth automation, customer care, and advertisement solutions on WhatsApp. In this blog, we will guide you through the step-by-step development of WhatsApp Meta Cloud API.
Step 1: Sign up for a Meta Developer Account
You must have a Meta Developer account to use the WhatsApp Cloud API. Here are the steps to sign up for it:
Visit the Meta for Developers website.
Browse Get Started and log in with your Facebook credentials.
Accept the terms and conditions to continue.
Step 2: Create a Meta App
After your developer account is prepared, you have to create a new app in Meta:
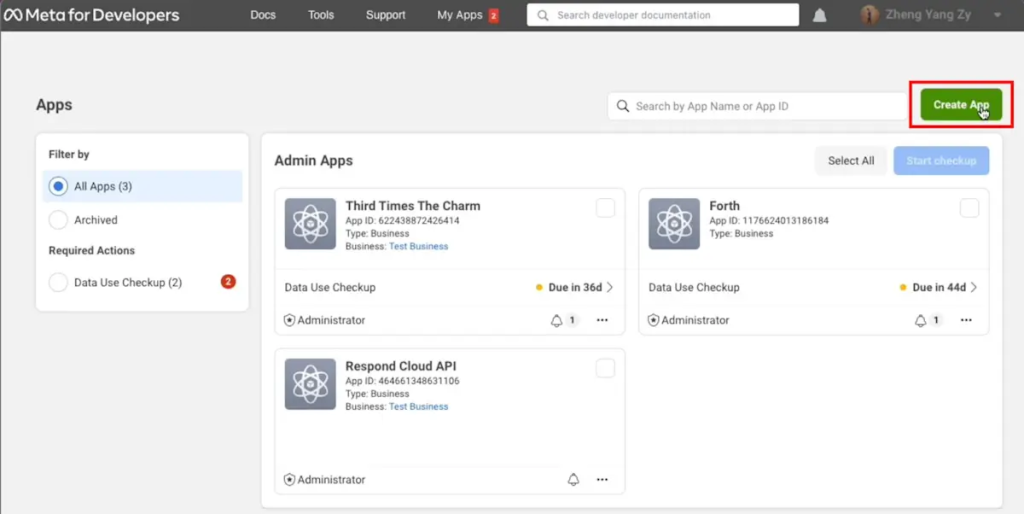
List My Apps on the Meta Developer dashboard.
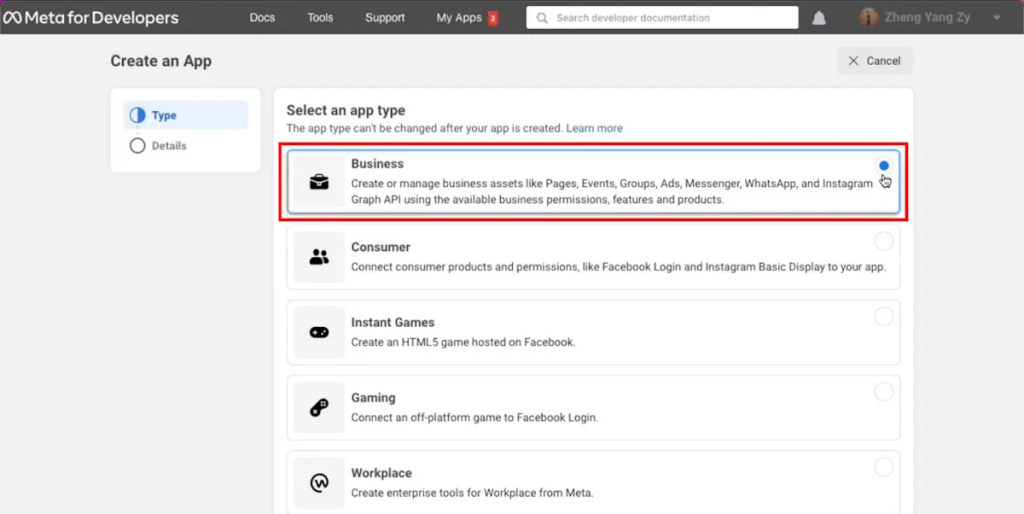
Click on Create App and select Business as the type.
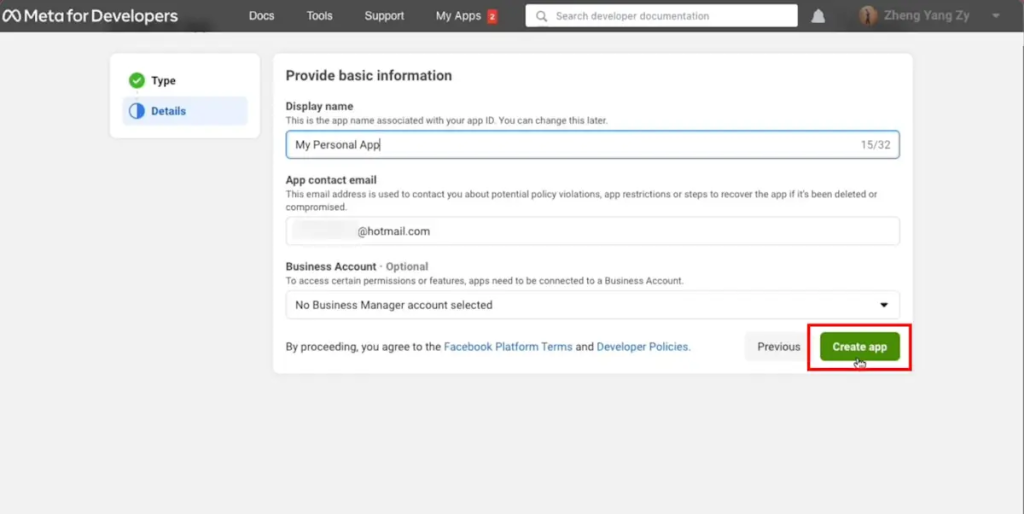
Enter the App Name and your Email Address, and select a Business Account (if applicable).
Click Create App and complete the security verification.
Choose Top Digital Marketing Services in Karachi
Contact us now and let's embark on the journey to online success together!
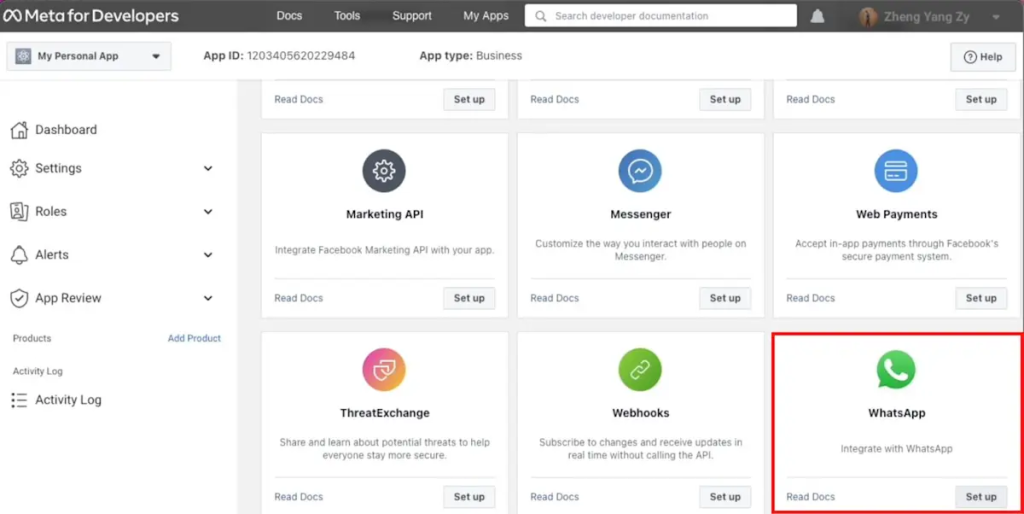
go to Dashboard > Add a Product in your newly created App.
Select WhatsApp and click Set Up.
You will be redirected to the WhatsApp Business Platform.
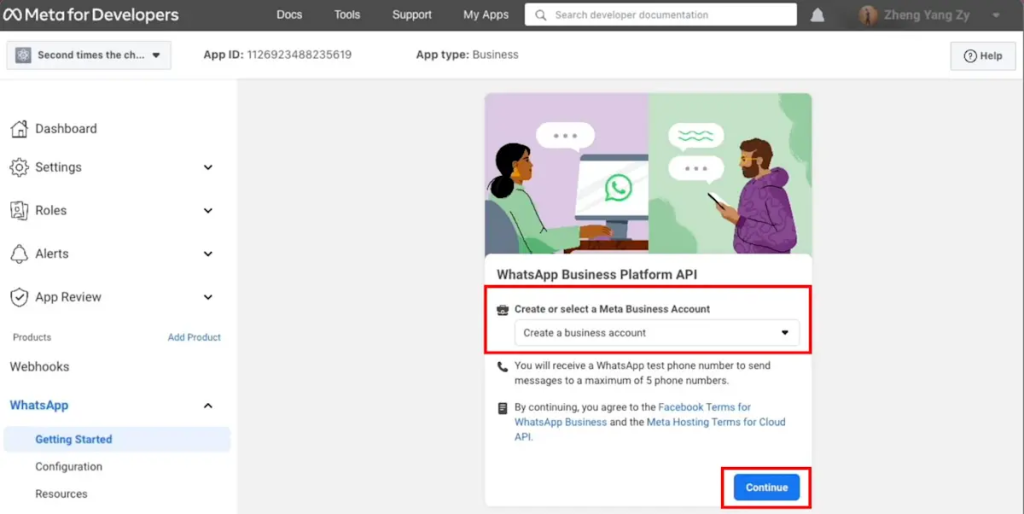
Step 4: Create a WhatsApp Business Account
Click Start Using the API.
Choose an existing Meta Business Account or create a new one.
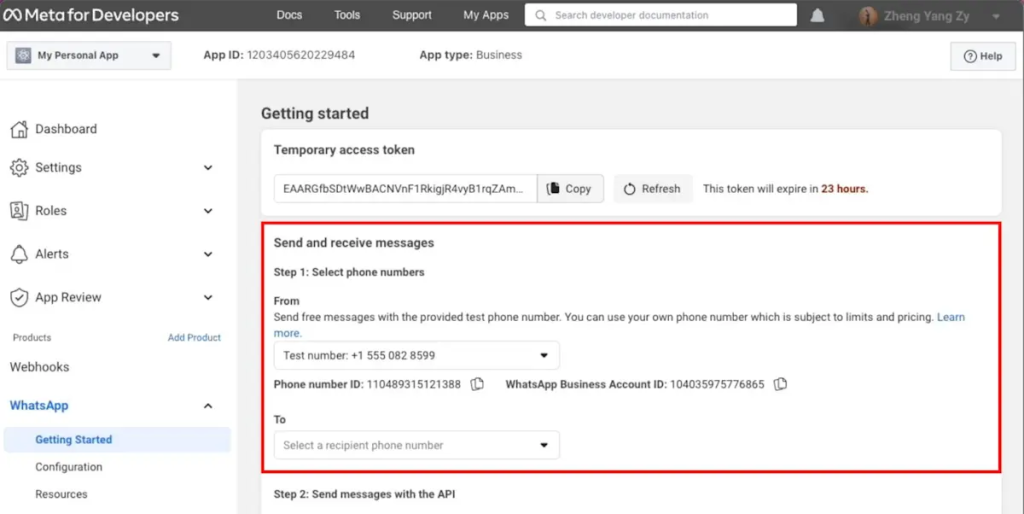
Upon completion, a temporary WhatsApp Business phone number will be allocated to you.
You will be provided with a Test API Token, which you will use to send test messages.
Step 5: Create a Permanent Access Token
To use it live, you require a permanent access token:
Go to Meta Business Suite and go to Business Settings.
Click Users > System Users and create a new system user.
Give the Admin role to the system user.
Create a token with WhatsApp Business API permissions.
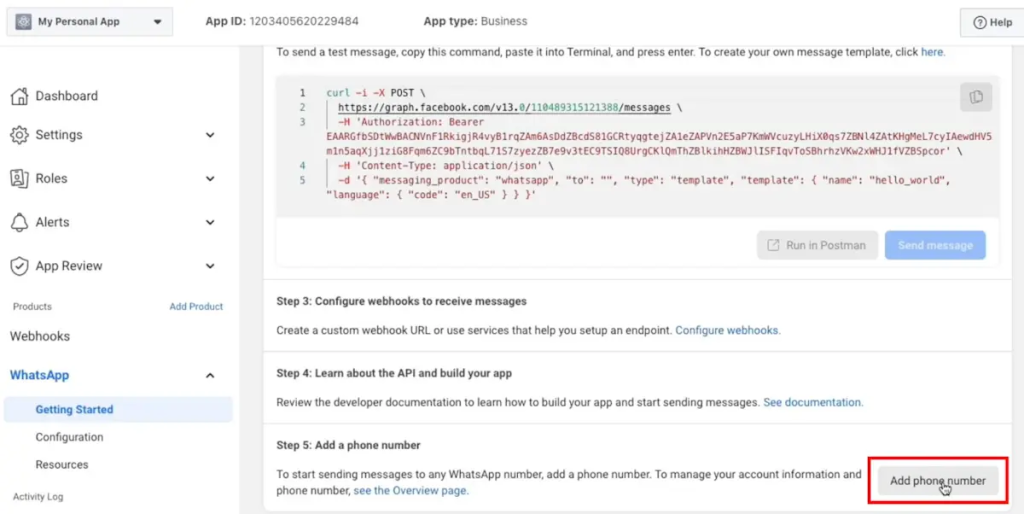
Step 6: Connect Your Phone Number
To use WhatsApp Cloud API, you must register a phone number:
In the WhatsApp Business API section, click Phone Numbers.
Enter a new number and confirm it with an OTP received on WhatsApp.
Your number is now verified; you can use it to send and receive messages.
Step 7: Test API with Postman
To confirm your setup works:
Open Postman (an API testing tool that is free).
Make a new request and insert the WhatsApp Cloud API URL.
Authenticate using your Access Token.
Send a test message to verify that everything works.
Conclusion
By doing so, you can effectively create WhatsApp Meta Cloud API and begin integrating WhatsApp messaging into your Business. This enables you to automate customer support, send bulk notifications, and build seamless communication experiences.
Check out WhatsApp Business API documentation on the Meta Developer site for additional optimizations.
Choose Top Digital Marketing Services in Karachi
Contact us now and let's embark on the journey to online success together!