Google Tag Manager lets you create completely new events that don’t need to be based on events already sent to Google Analytics.
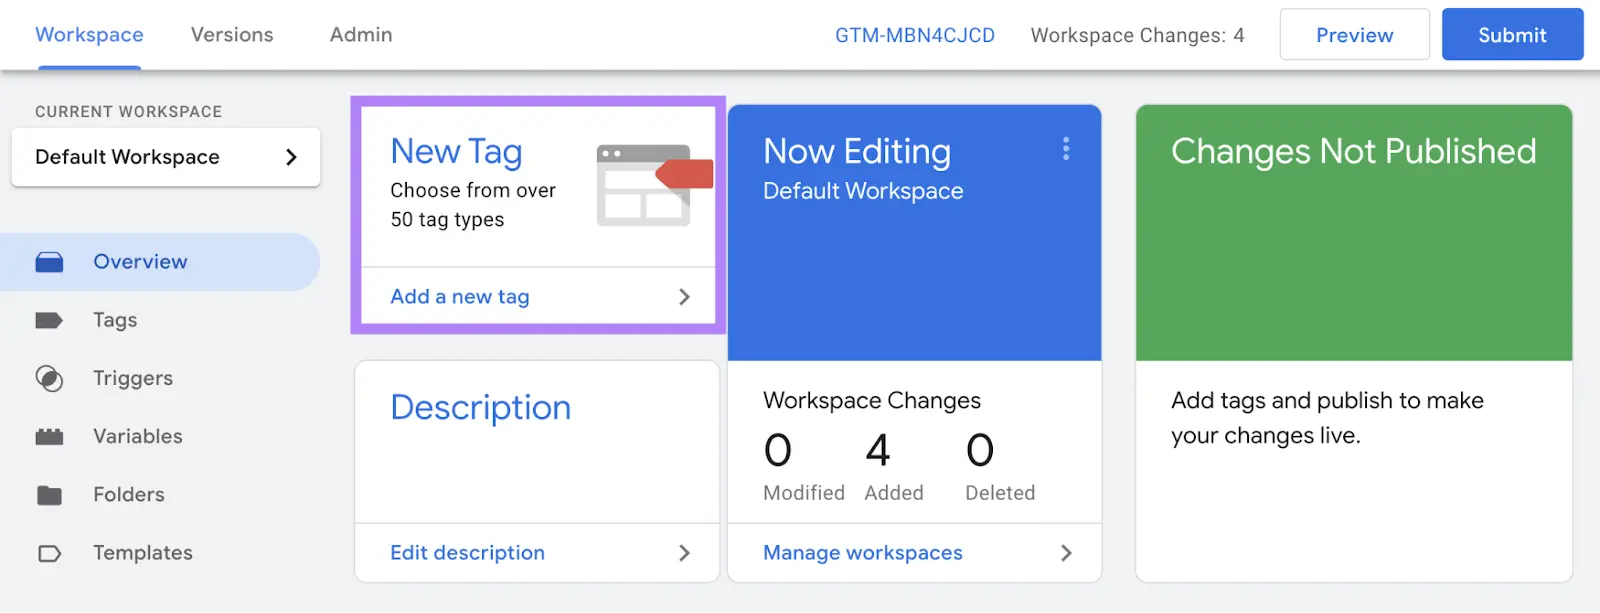
Log in to GTM. And click “New Tag” from the “Overview” screen.
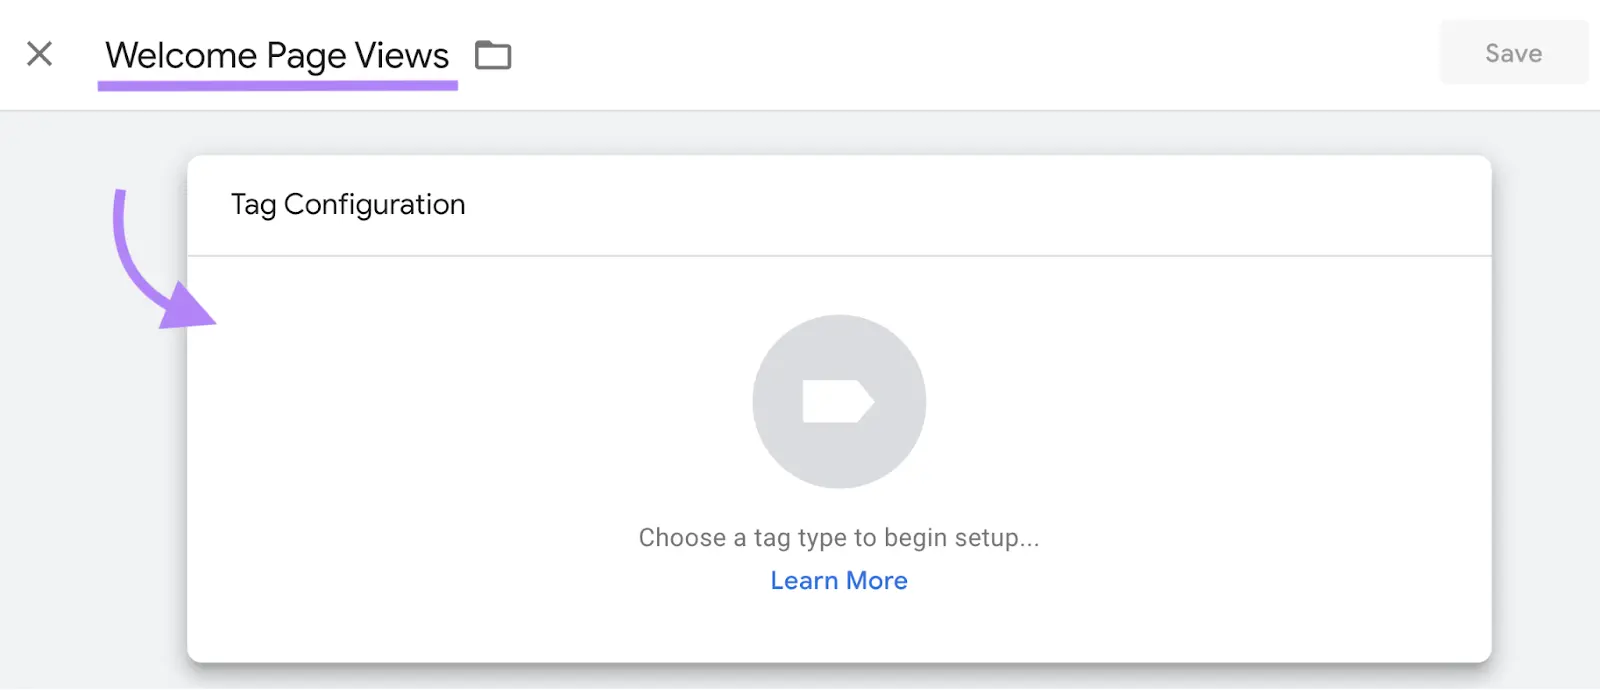
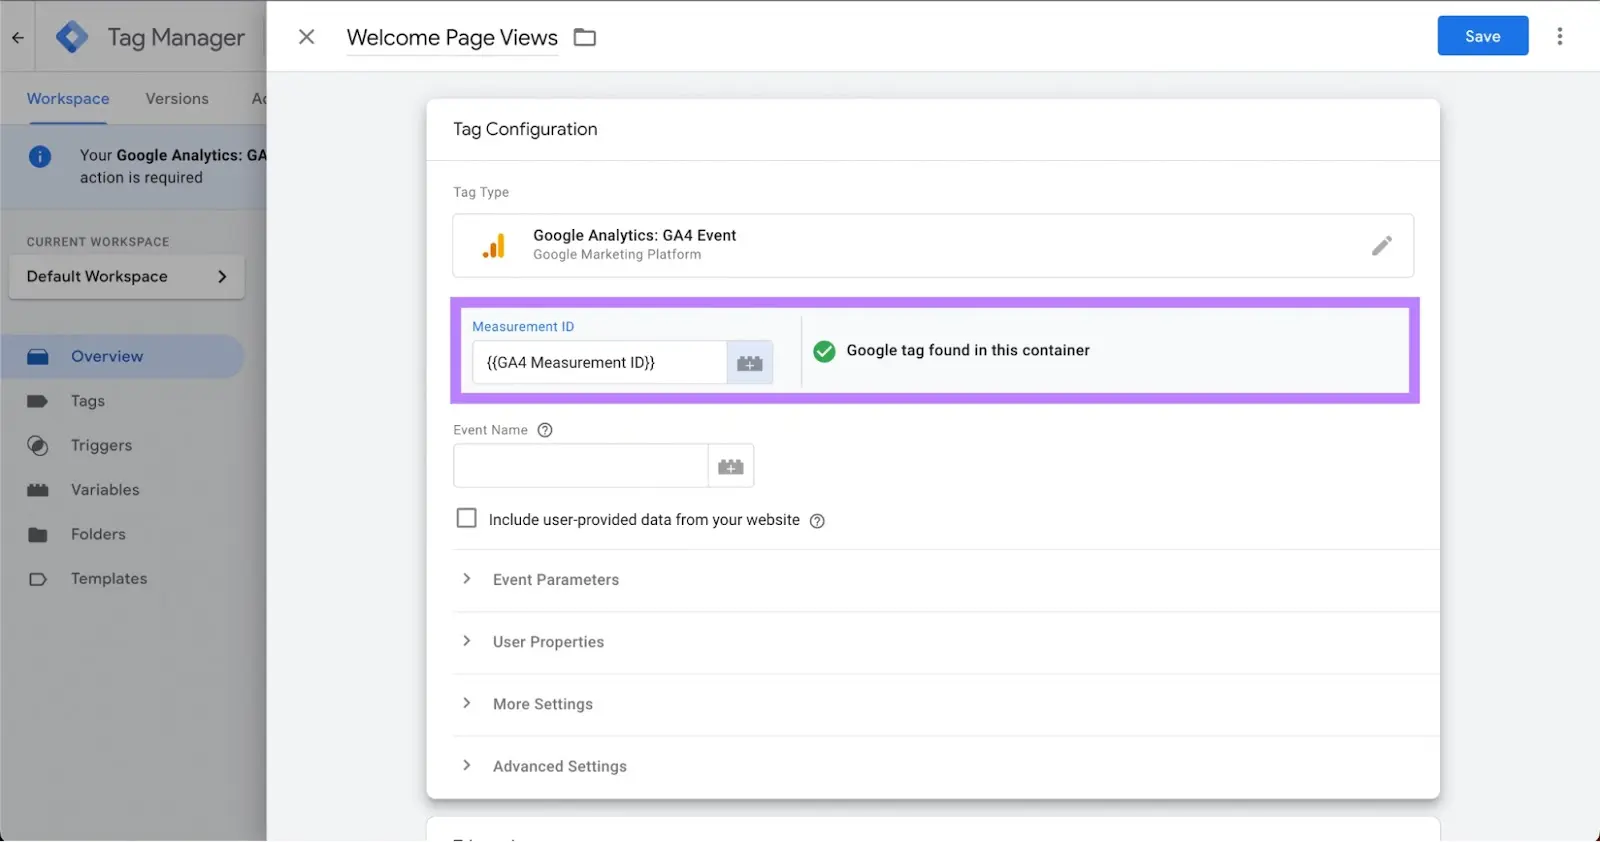
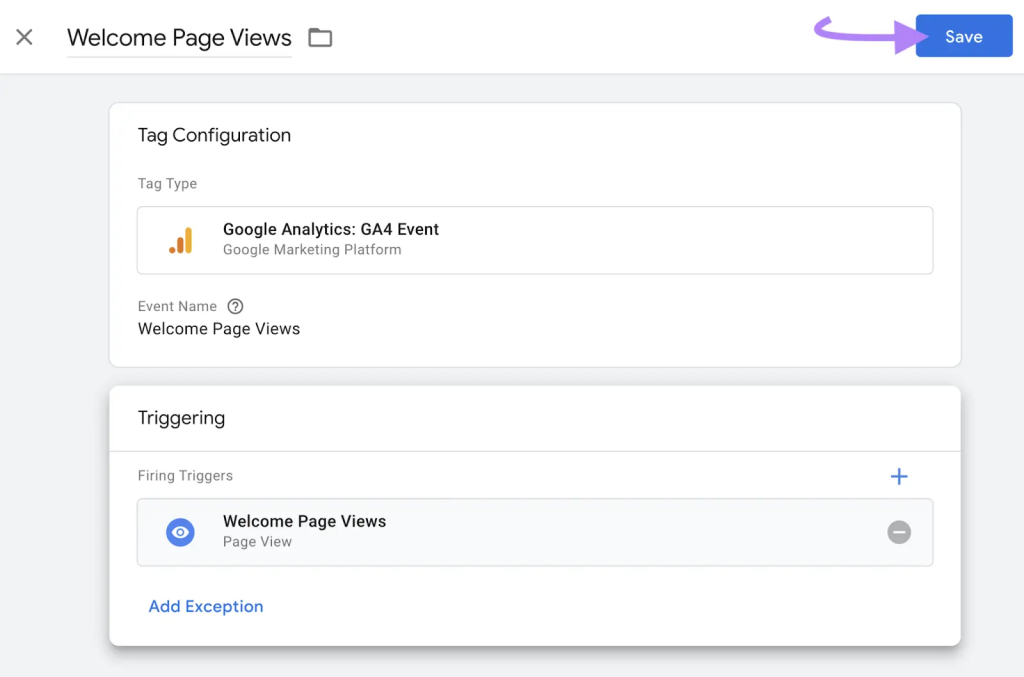
Name your tag something that’s easy to understand. For this example, we’ll track views of a welcome page. Then, click “Tag Configuration.”
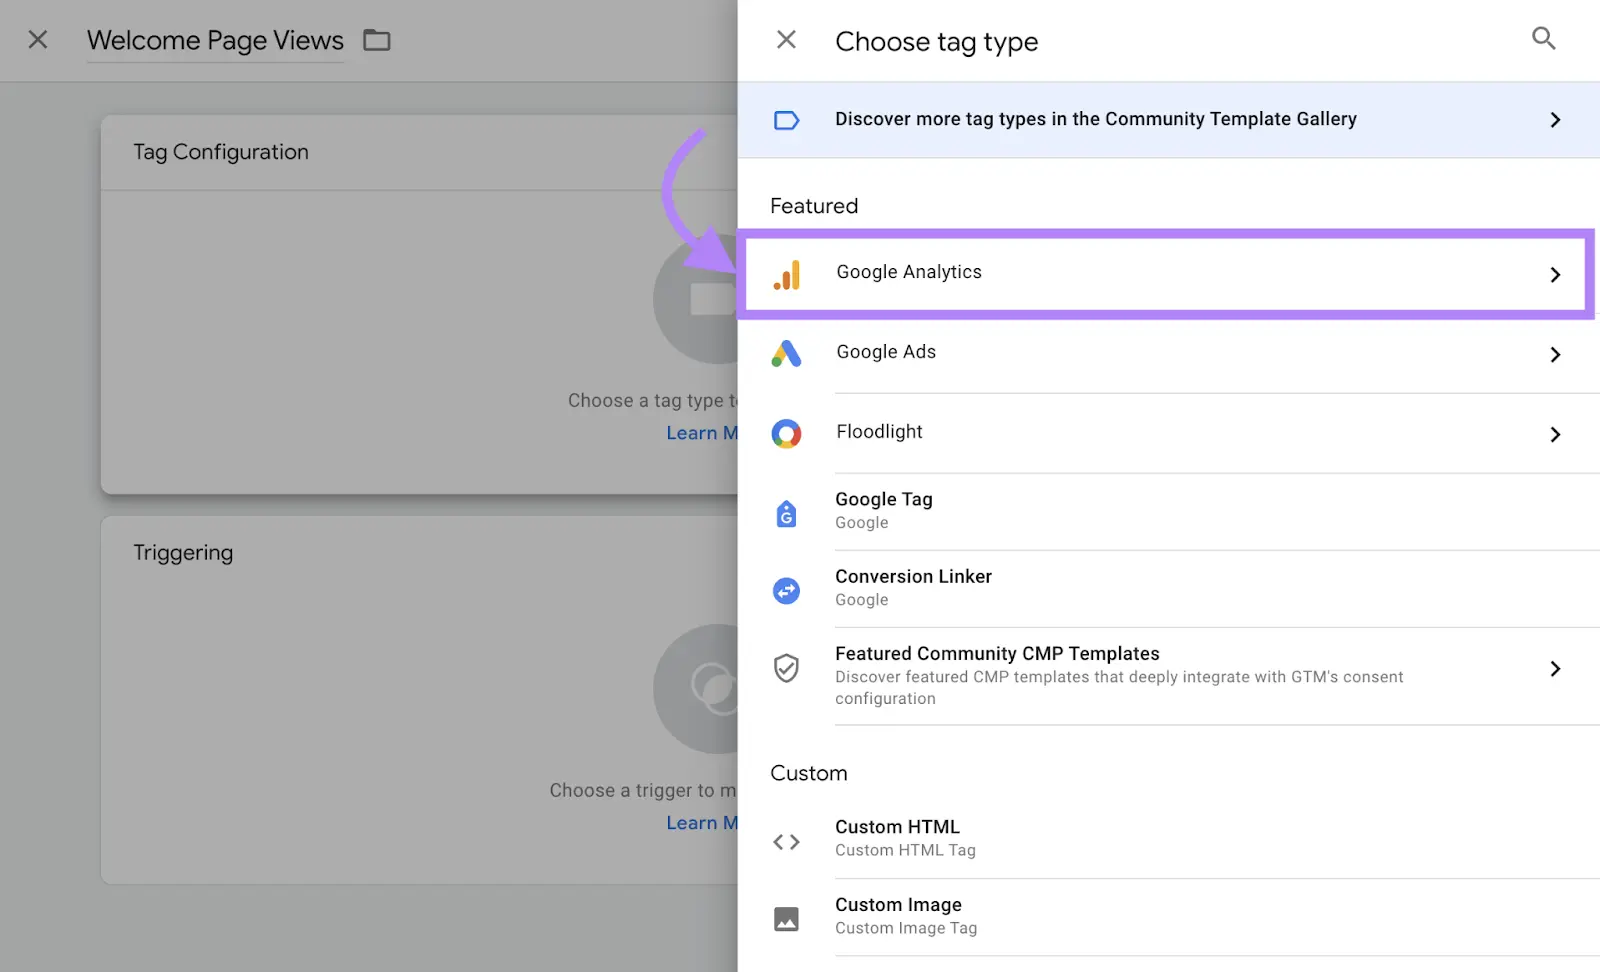
From the menu that appears, select “Google Analytics.”
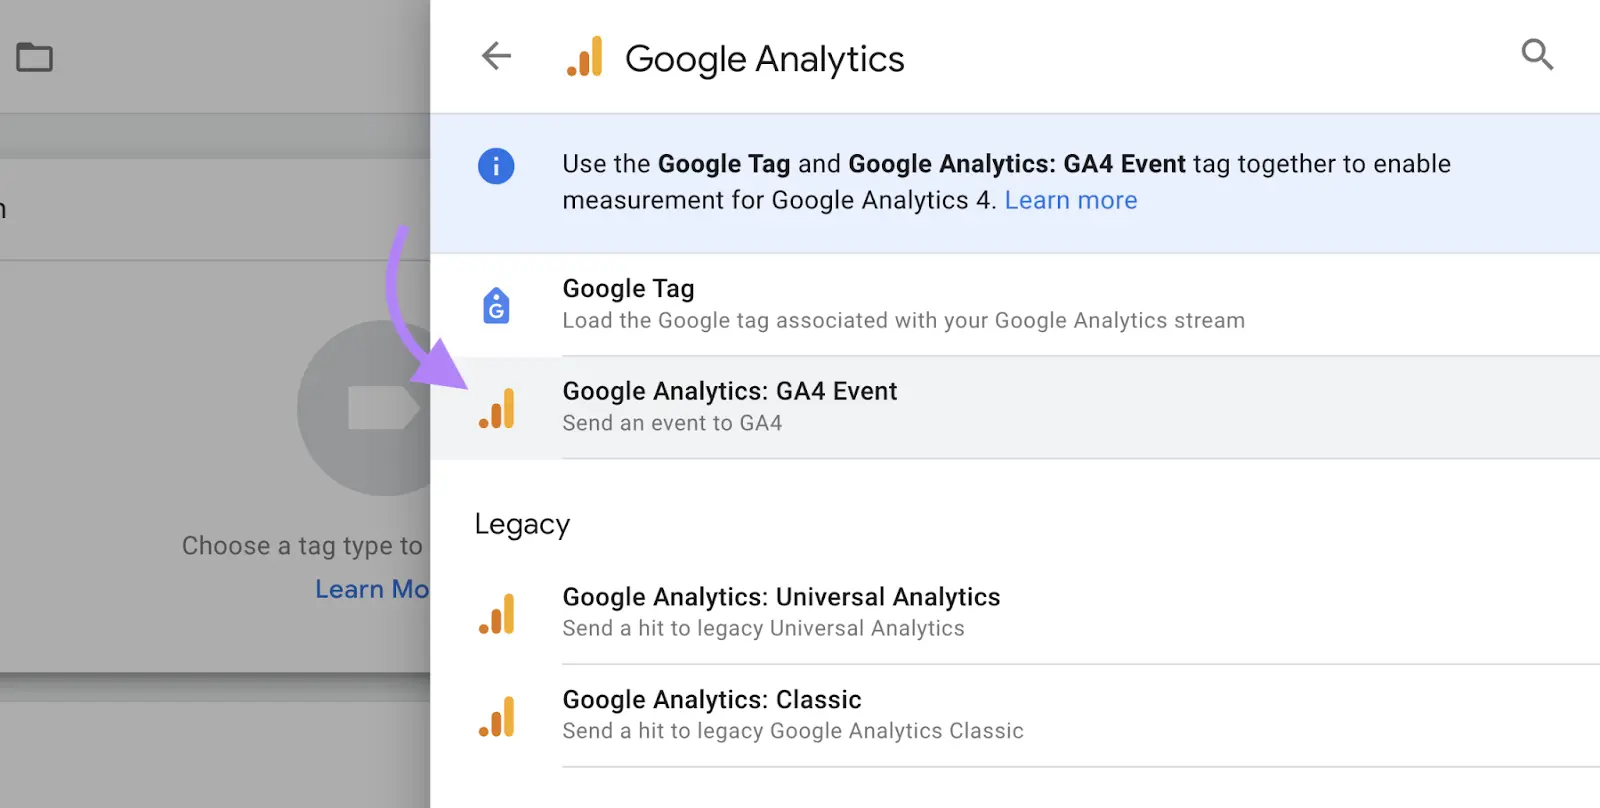
Then, select “Google Analytics: GA4 Event.”
Copy and paste your Measurement ID in the field.
Next, enter your event name, keeping in mind naming best practices. This name will show up in your reports, so make sure it’s easy to understand.
Now define the action that you want to track. This is known as the trigger. It’s the specific condition or set of conditions that you define to determine when a particular tag should be fired.
For this example, we want to track each time someone views a specific page: a welcome page with “/welcome” in the URL.
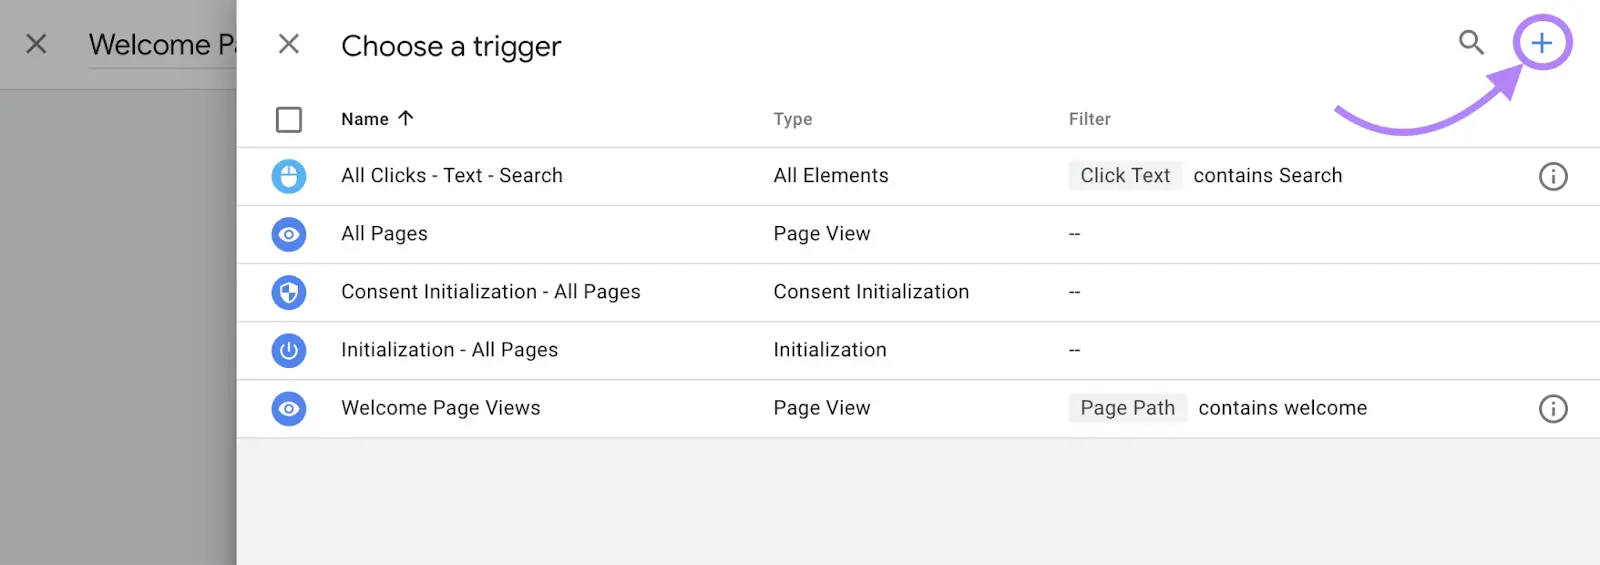
Scroll down and click “Triggering” (it appears directly under the “Tag Configuration” module) to open the menu.
Once the “Choose a trigger” menu opens, click the “+” symbol in the upper right-hand corner. This allows you to set up a custom trigger to fire only on the pages you specify.
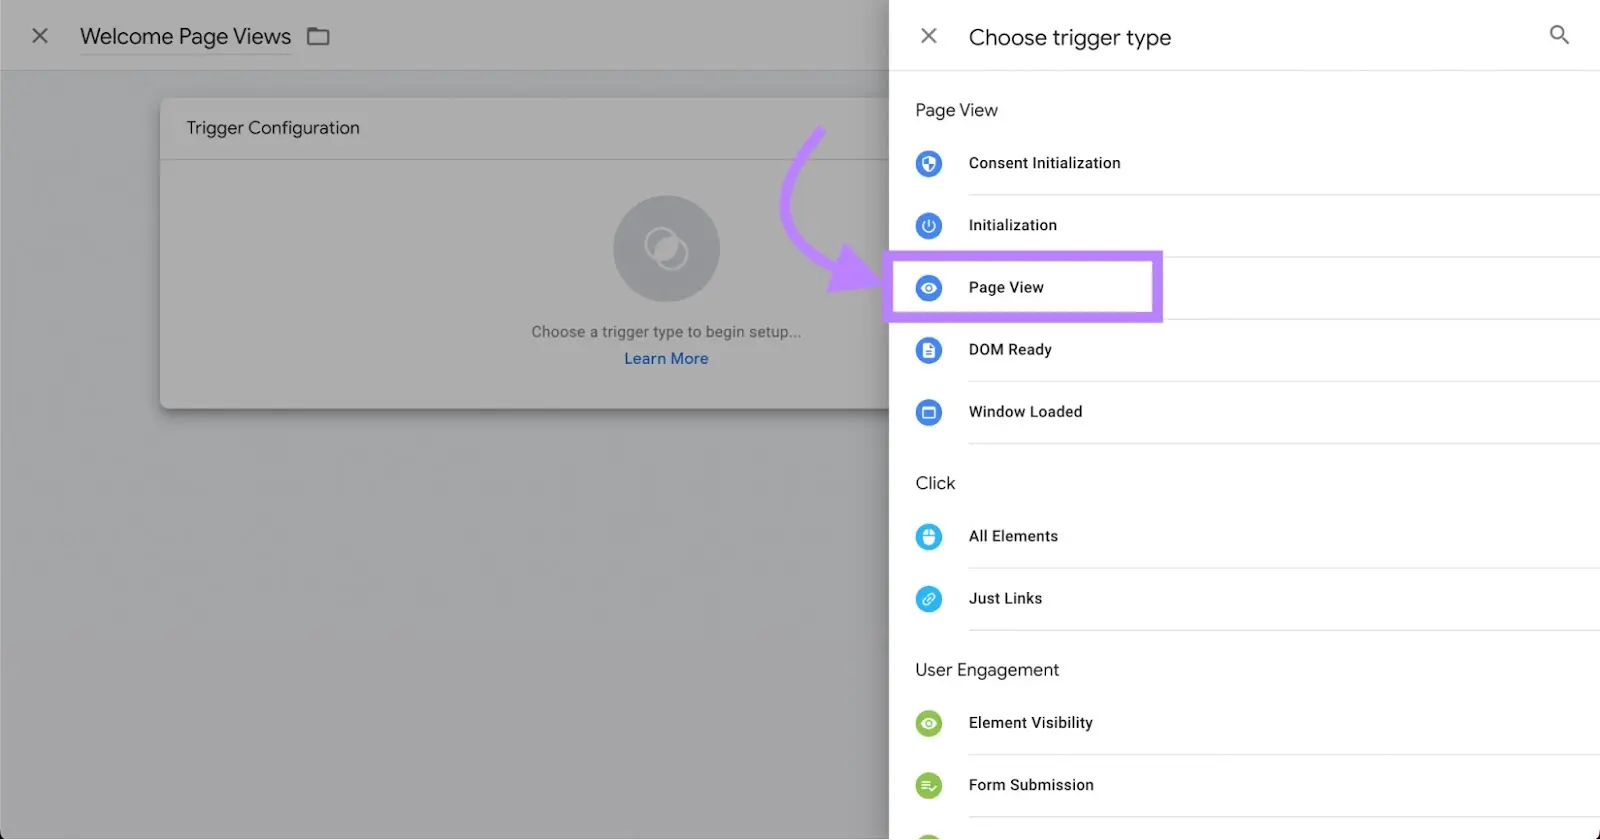
Next, click the “Trigger Configuration” module.
You should choose the trigger that corresponds with what you are attempting to track from the list of alternatives that will appear. Here, we will go with “Page View.”
Choose Top Digital Marketing Services in Karachi
Contact us now and let's embark on the journey to online success together!
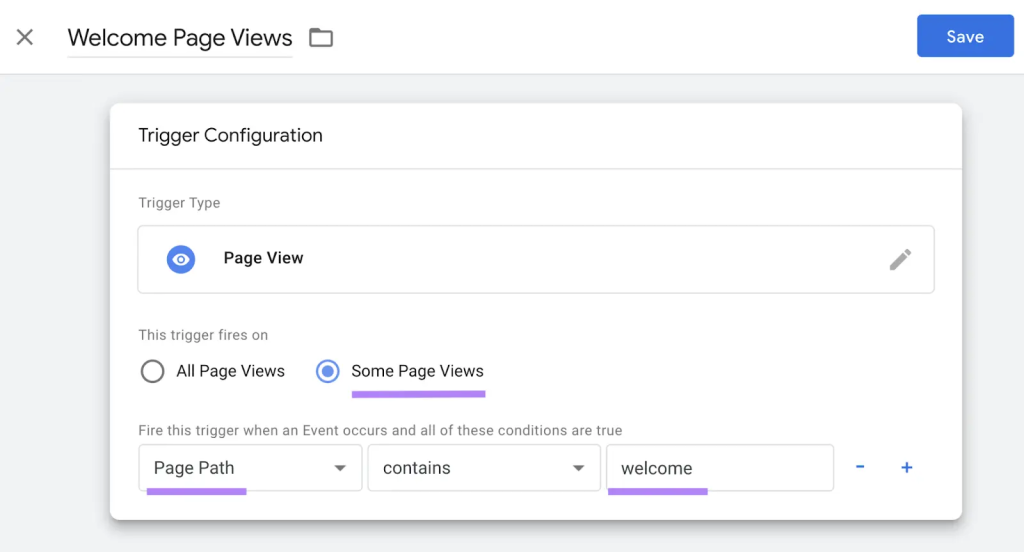
Now, you can choose which pages the event will launch on. Choose the circle that is adjacent to “Some Page Views.”
In the first drop-down menu, select “Page Path,” and in the second drop-down option, select “contains.” Additionally, enter “welcome” in the text field. (This indicates that when a user views a page with the URL path “welcome,” the event will be triggered.)
The “Tag Configuration” and “Triggering” modules will now return to the screen.
Click “Save” in the top right corner once more.
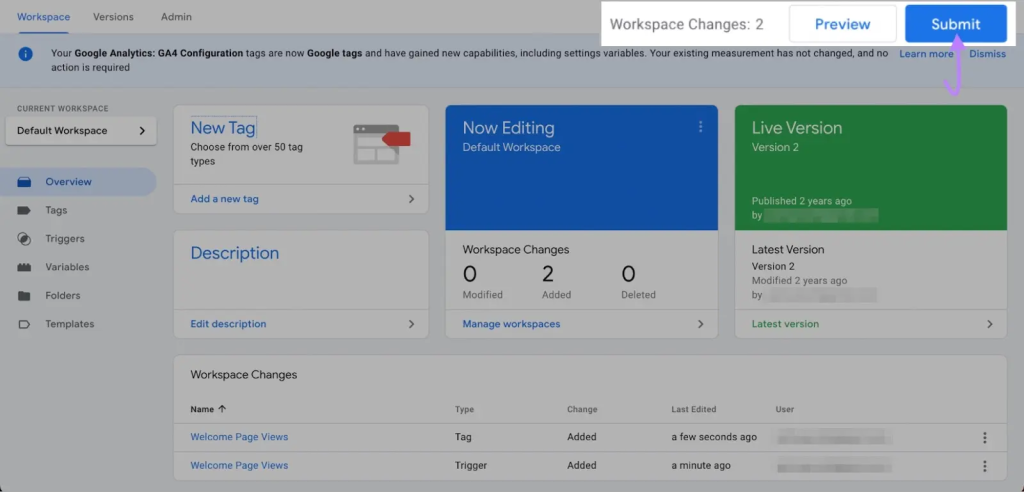
This will return you to the “Overview” panel. Click the “Submit” button in the top right corner to make the changes live.
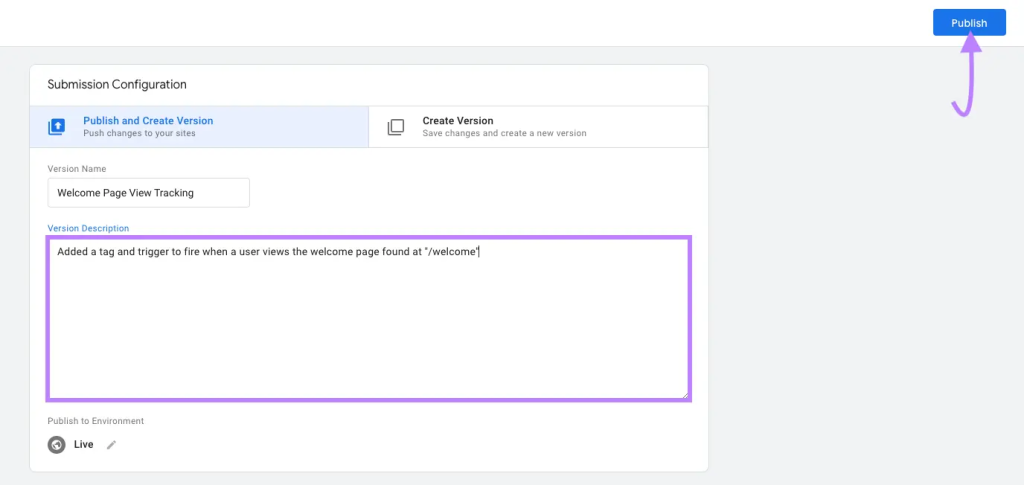
You must enter a name in the “Version Name” area and a description in the “Version Description” field on the resulting screen.
Click “Publish” after that.
Choose Top Digital Marketing Services in Karachi
Contact us now and let's embark on the journey to online success together!