How to link WordPress Website and Google Analytics?
How to link WordPress Website and Google Analytics?
Google Analytics may be added to a WordPress website in a number of ways, but most of them involve adding code to the site header or installing a plugin like Google Site Kit. We provide a simple configuration for WordPress.com site owners to activate Google Analytics without the need for plugins or coding to track impact of their SEO strategies.
Create an Account with Google Analytics
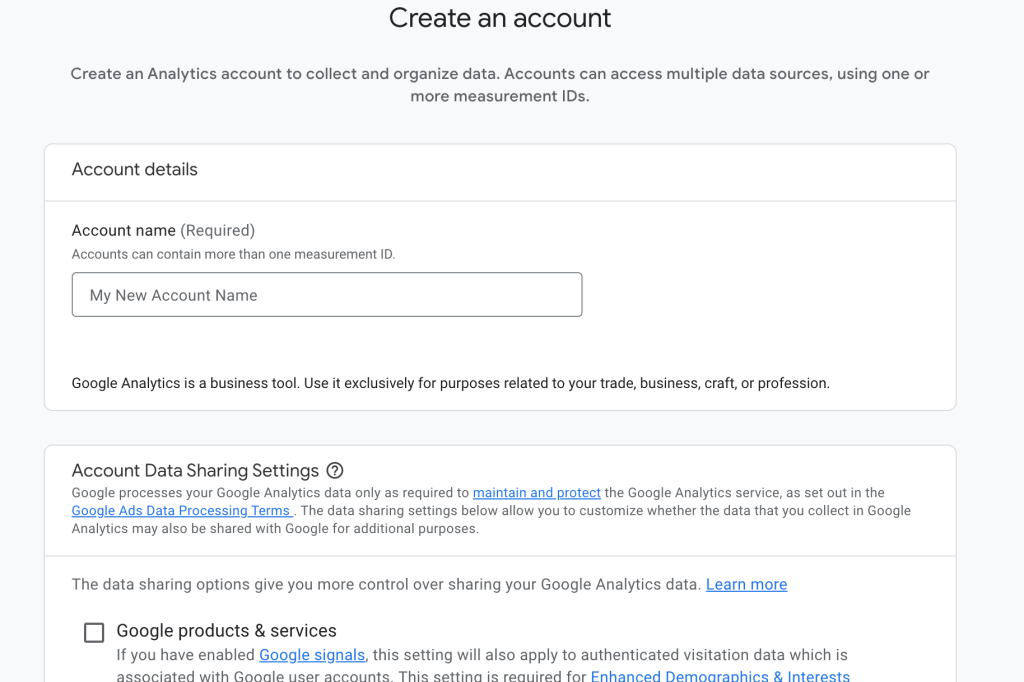
Click the Get Started button to create an account on the Google Analytics website. Upon registering, you will be asked to provide your “Account name” and choose whether to accept or reject the data-sharing options listed below. Click Next when you are ready to go.
Click Admin, click “Create Account,” and then proceed to the next steps if you already have a Google Analytics account for another website. You will be prompted to establish a property in the following stage, which is probably going to be the name of your website.
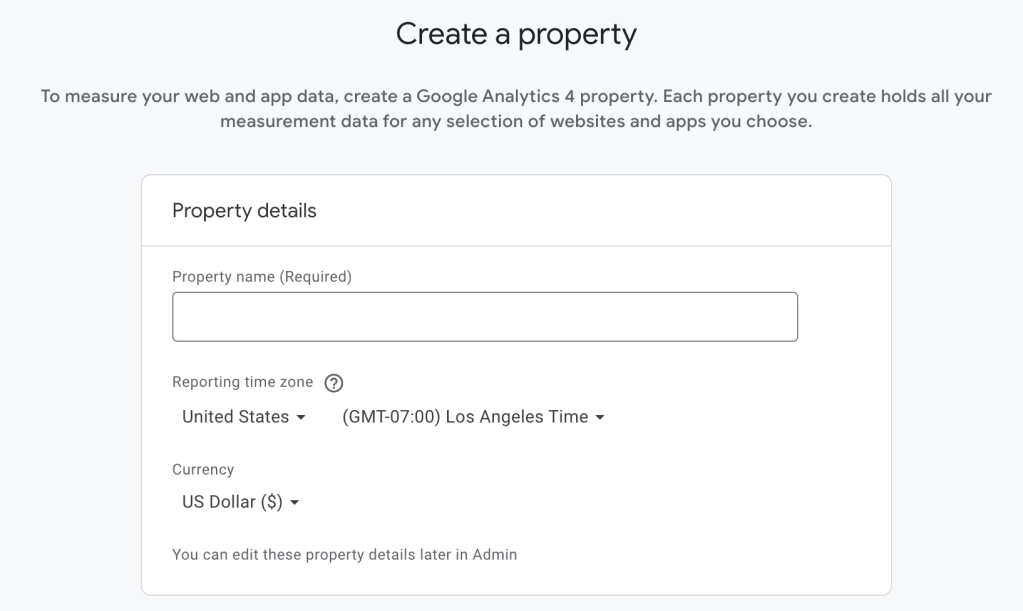
Enter the following information on the Property Setup screen:
Property Name: Type in the name of your property, such as the title of your website.
Reporting Time Zone: Select the time zone in which you would like your website to report.
Currency: Select the local currency of the area where you typically conduct business.
Enter the necessary information about your company or sector on the next screen, then press the Next button.
You will be prompted to select your Google Analytics target or goals on the next screen. Click the “Create” button after selecting everything that applies:
Choose Top SEO Services in Karachi
Contact us now and let's embark on the journey to online success together!
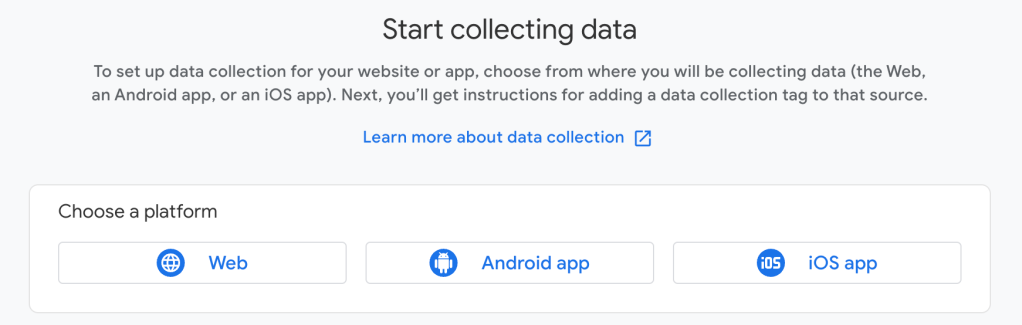
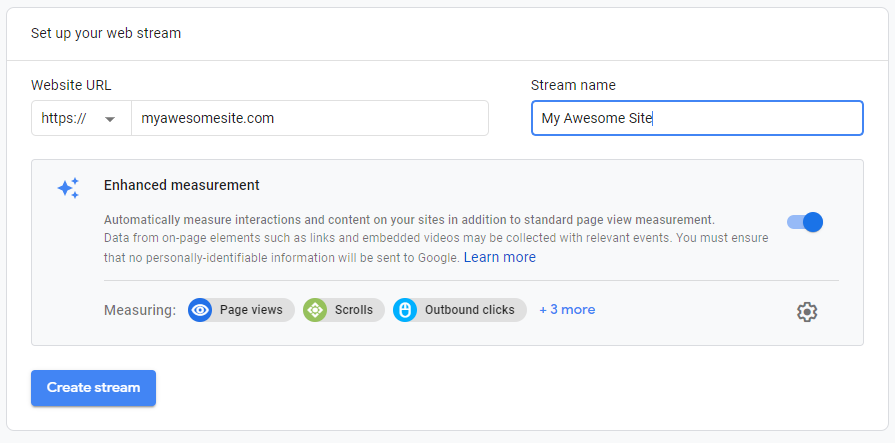
After that, this screen will appear and prompt you to select a property: Click here to select Web. Without the www, type your domain while keeping https:// chosen. Click Create Stream after entering something in the Stream Name field (which might be the title of your website once more).
Obtain Your Measurement ID in Next Step
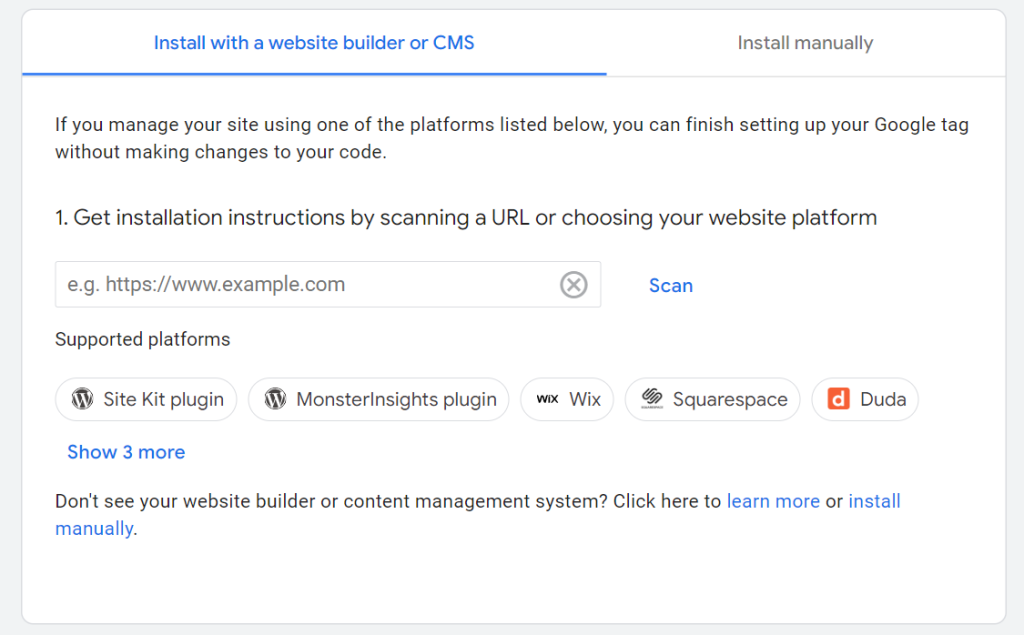
You will see this screen to add a Google tag to your website after completing the procedures in the previous section:
Next to “Site Kit plugin,” click the WordPress logo. Instead of using the plugin, selecting this option will display the tag ID for your website, which looks like this example:
To copy your tag ID to your clipboard, click the copy icon next to it.
You can follow Google’s instructions to set up your Google tag using their Site Kit plugin if your website is plugin-enabled. However, since WordPress.com gives you the option to paste your tag ID, this is not necessary. Proceed to the following portion of this instruction after copying only the tag ID as indicated above.
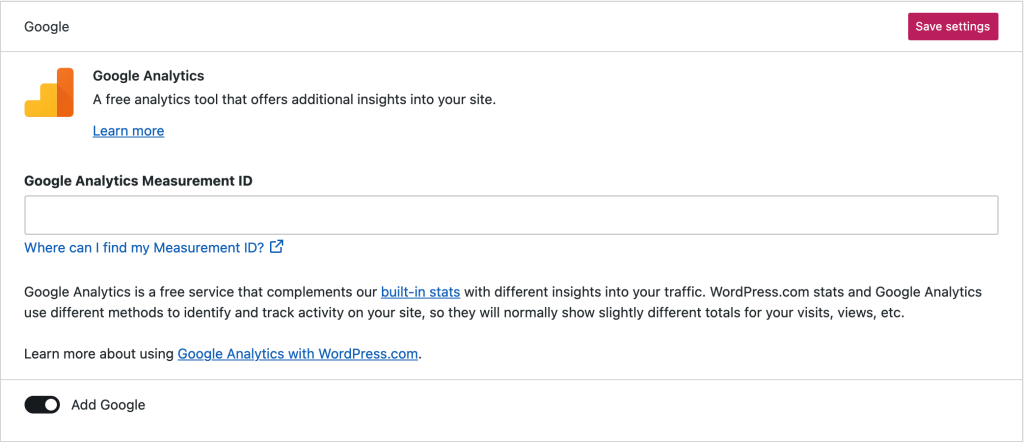
Update Your WordPress Website with the ID
Go to the WordPress.com dashboard for your website.
Select Tools → Marketing (or, if using WP-Admin, Jetpack → Settings).
Pick the tab for traffic.
Go to the Google area by scrolling down the website about halfway.
Enter your tag ID in the “Google Analytics Measurement ID” field.
Press the button to save the settings.
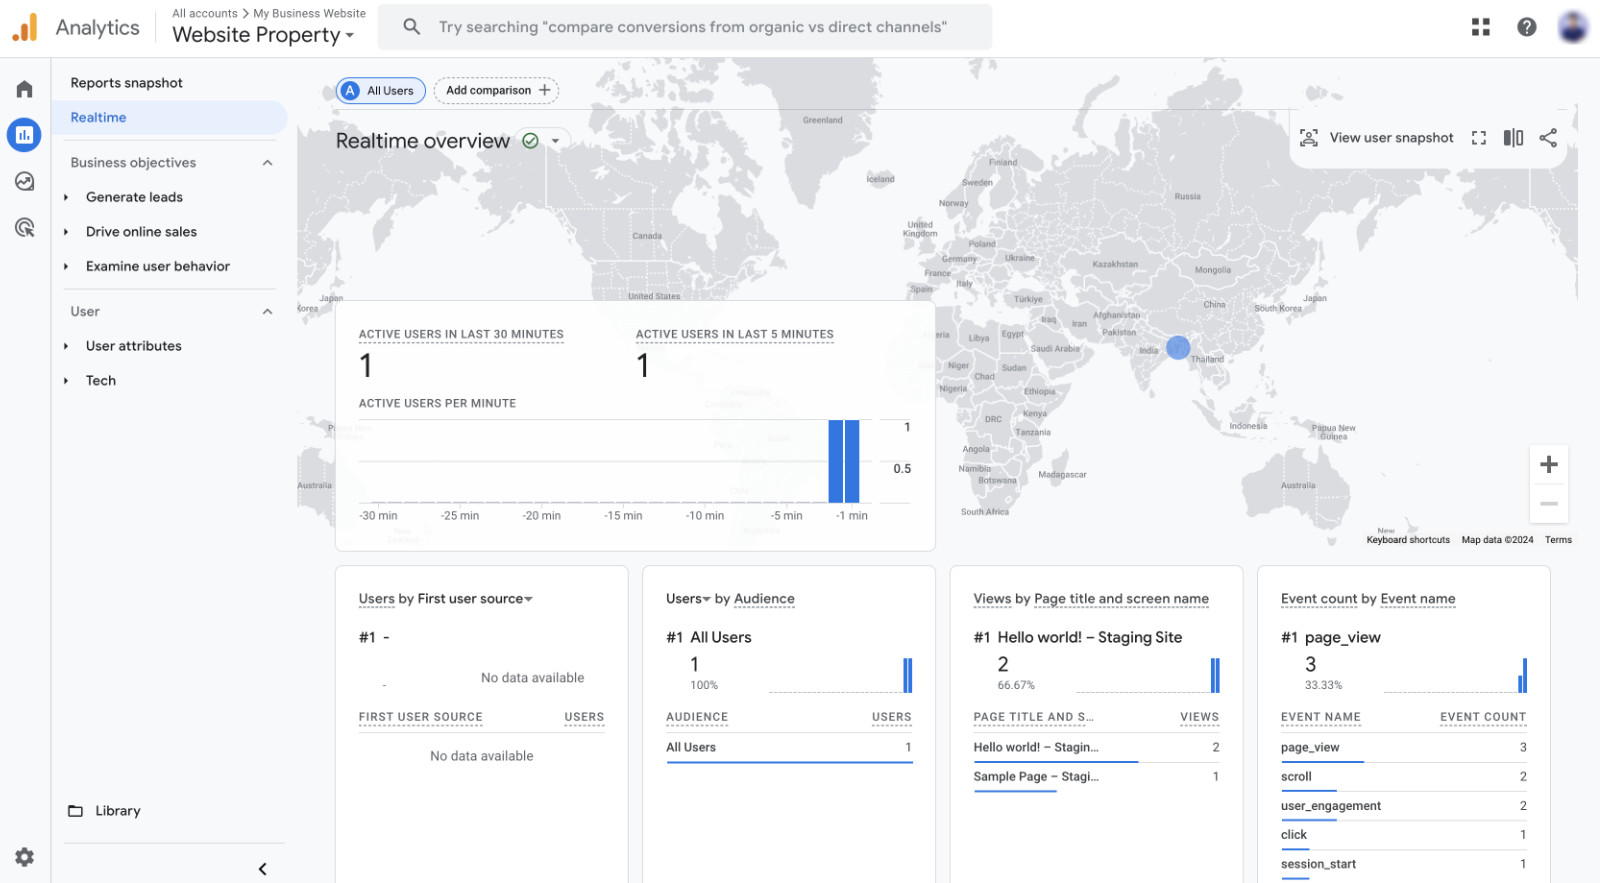
Data will now be sent to Google from your website’s connection to Google Analytics. Give Google some time to begin presenting the data from your website (numbers from before your site was linked to Google Analytics will not show up).
Choose Top SEO Services in Karachi
Contact us now and let's embark on the journey to online success together!